Following a recent webinar, talking about “Using Paid Ads to Grow Your Brand in 2020”, Will answered some questions which were submitted throughout the chat facility — one of these being “Please talk through a bit more on how to set up remarketing: e.g. Google remarketing or Facebook remarketing”. So we put together this simple guide to walk you through the steps of setting up Facebook Remarketing. Of course, if you need a hand, please feel free to get in touch.
In order to be able to remarket to users who have previously visited your website, you must first set up the remarketing tag from each advertising channel that you plan to serve ads on.
In this guide, we will use Facebook as an example and take you through a step by step guide to create and implement the Facebook remarketing pixel to your website.
Firstly, if you have not already done so, you need to create a Facebook ad account. From here you need to click on ‘Audiences’ in the drop-down menu at the top left corner of the screen.
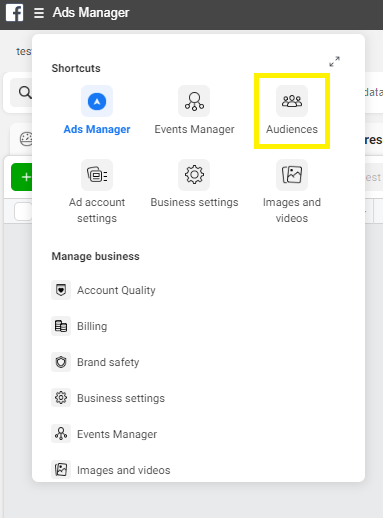
From here, click ‘Create a Custom Audience’.
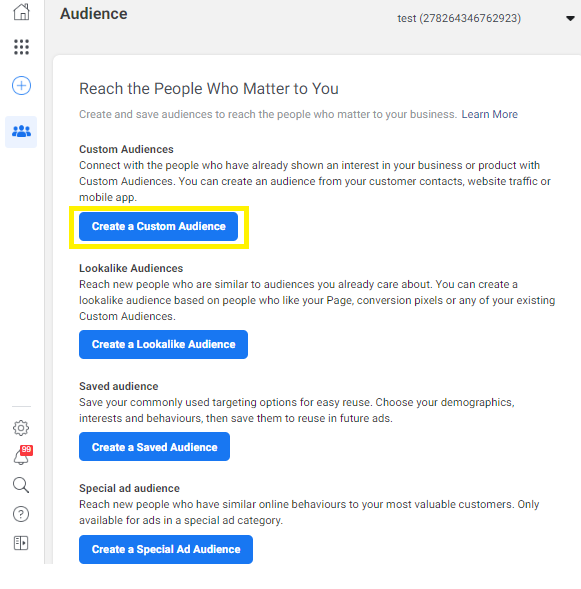
Then click on ‘Website’
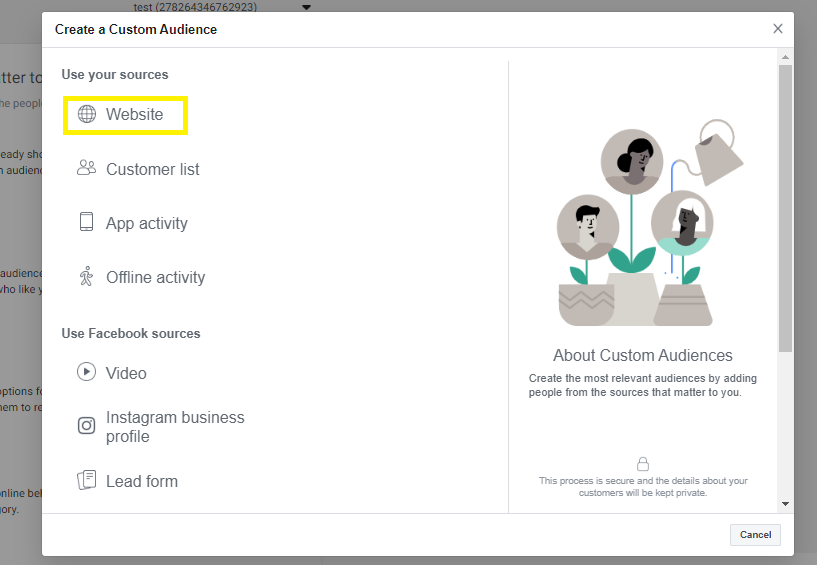
and give your Pixel a name and type in the website url as this will allow the system to check the pixel set up later on.
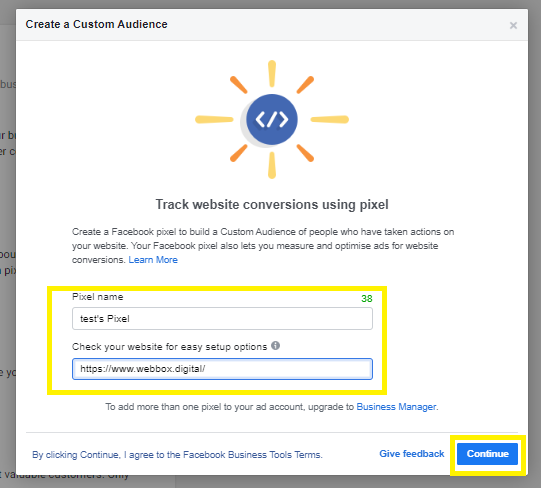
(This is where you will create your custom audiences or remarketing audiences. These audiences can be very in-depth and can take into account whether or not someone has already converted and so should be excluded from any remarketing etc.
However, to keep things simple we are just going to create a remarketing audience that will include anyone who has visited any page of the website in the last 30 days.
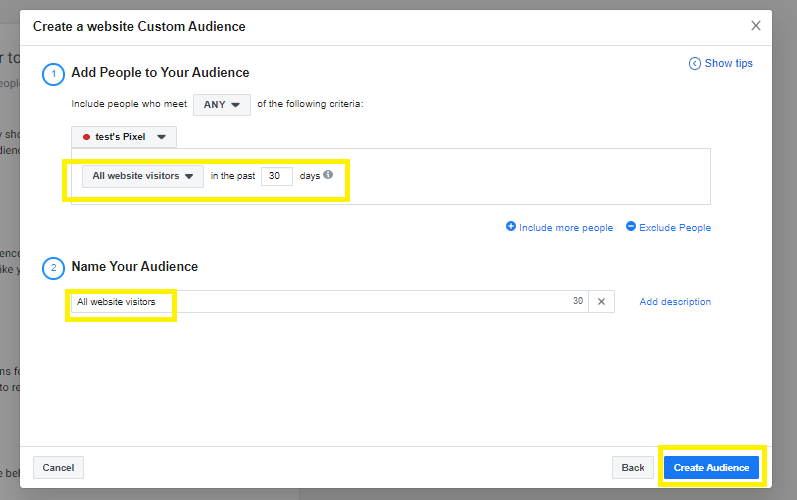
Once you have created your audience go back to ‘Data Sources’
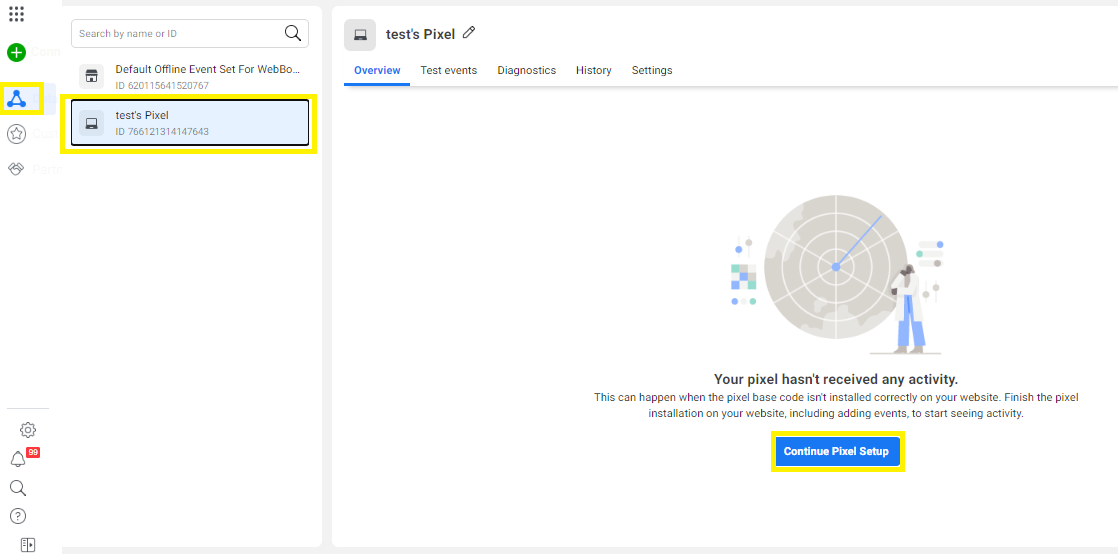
and click ‘Continue Pixel Setup’
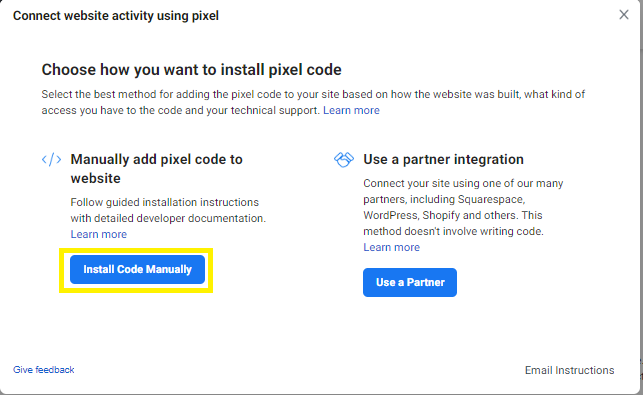
Now, there are two options, to either install the code manually or to use a partner integration such as Google Tag Manager or the integration relevant to what CMS your website is built on. For this example, we are going to click ‘Install the code manually’ as it is different for each partner integration.
From here, click ‘Copy Code’. This is what Facebook calls the ‘Base Code’ and it is the main code that must be installed on every page of the website to be able to remarket or set up conversion tracking.
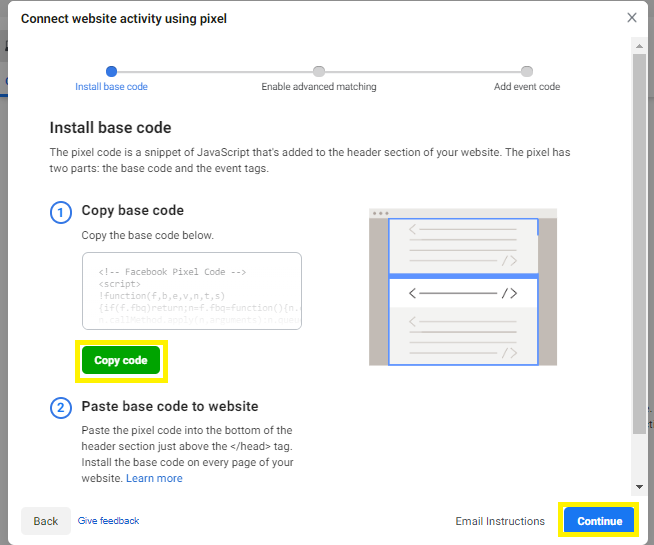
As you will see, it gives instructions as to where the code should be installed which is at the bottom of the ‘header’ section, above the </head> tag as shown in the screenshot.
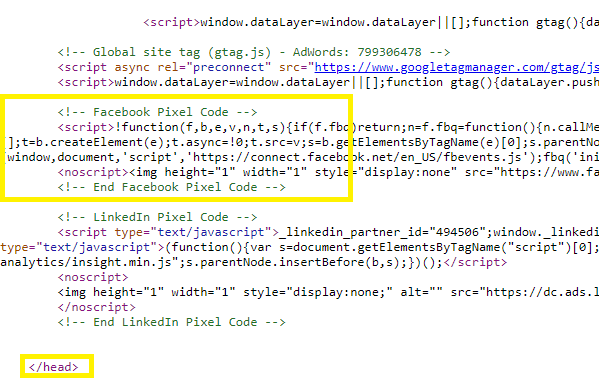
You will see that in this instance the example website also has the Google Remarketing Tag and the LinkedIn Tag as you need to install each platform’s tags that you wish to track and remarket with.
And that’s it! Hopefully, you found this ‘how-to’ guide useful. Do you have any further questions? If so, please feel free to connect with Will through LinkedIn or contact us as we would be happy to help.
